Small tools seem to vanish all the time.
The tape measure you bought last week, the hammer you swear you saw yesterday, and the drill that was definitely used this morning – all gone.
At first, these things might seem trivial.
After all, these tools are cheap and easy to replace, right?
But they’re not as small of a problem as they seem.
Losing them regularly adds up, and before you know it, small tools are costing you tens of thousands of dollars a year – both in the cost of replacement and the time your employees waste searching for them.
So, this is not something a business can or should afford to overlook.
Because of that, we’ve decided to put this article together and share with you 6 best practices for tracking small tools.
By the end, you’ll know exactly how to reduce these losses and keep your tools in check.
Ready?
Let’s get into it.
In this article...
1. Develop and Implement Effective Standard Operating Procedures
The foundation of small tools tracking starts with establishing and implementing Standard Operating Procedures (SOPs).
There are many definitions for an SOP, so let’s start by choosing one. Tom Hughes, GembaDocs co-founder, nailed it with his:
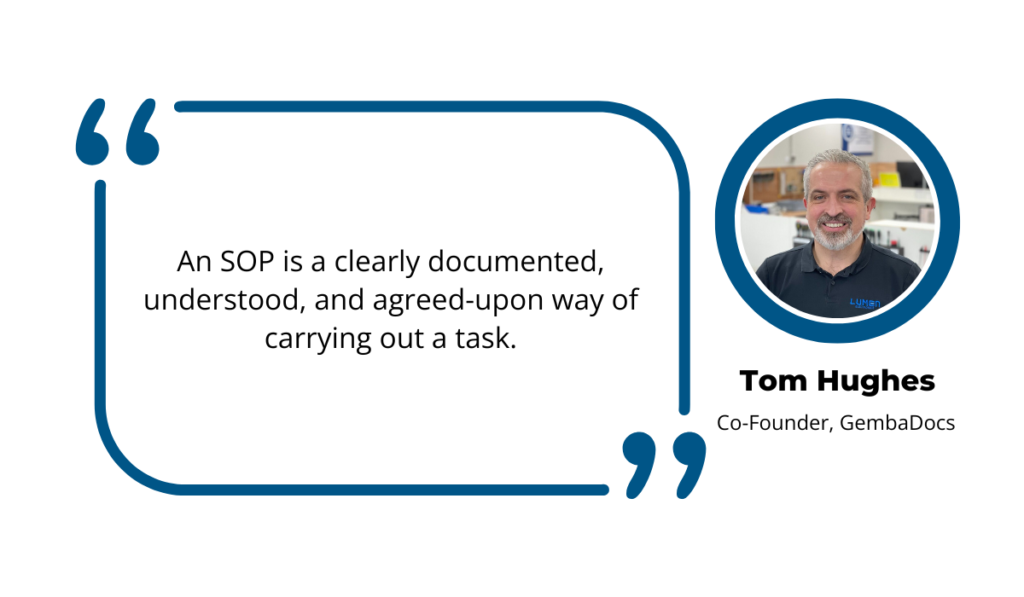
This is, arguably, one of the best SOP definitions as it explains everything SOP is and should be in just a few words.
But, why are SOPs so important?
By having a clear step-by-step guide on managing tools, you ensure employees are using tools effectively, and handling and storing them properly.
All of this leads to:
- fewer lost items,
- less downtime,
- and more efficient workdays overall.
Now that you understand the importance of SOPs, the next question is: How do you establish them?
First, decide which tools need an individual SOP and whether an SOP can cover a whole group of tools.
For example, you don’t need separate SOPs for using, handling, and storing a hammer and a screwdriver. You can create one SOP for all non-powered hand tools.
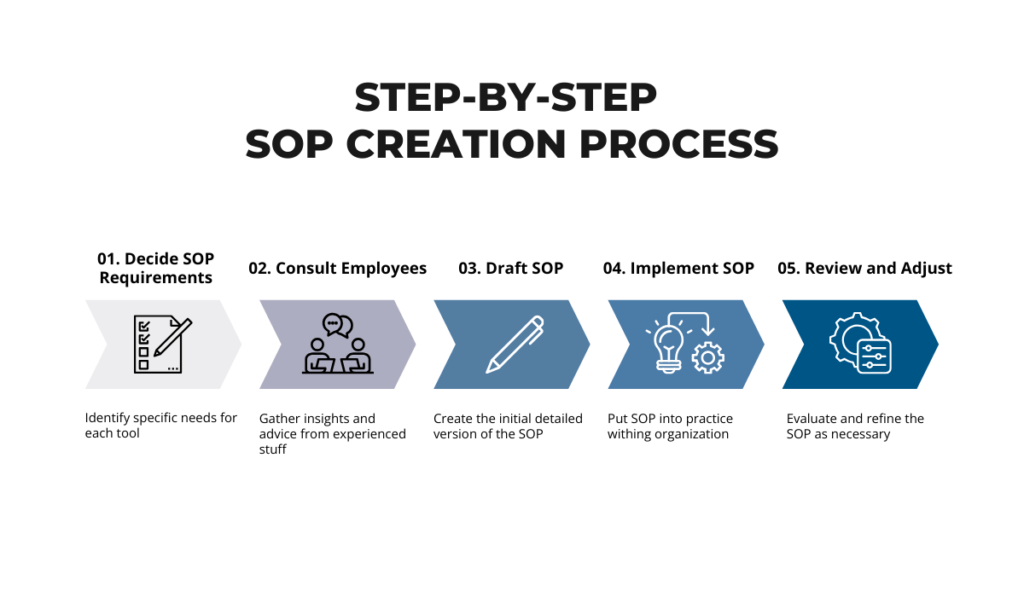
Once you’ve figured this part out, call in your most reliable and productive employees – those who work most often with the tools you’re writing SOPs for.
They know the tools best and can help you develop the most efficient, effective, and safe procedures.
Finally, start writing things down.
Your SOPs should cover everything from how tools are checked out and returned, to how they’re stored, maintained, and reported if damaged or lost.
Each step should be written down with no room for confusion so everyone knows what is expected of them.
If you’re looking for a starting point, TemplateLab has a range of SOP templates that cover most scenarios. Pick the one that suits your operations, customize it, and you’re ready to go.

This process we’ve described is the fastest and simplest way to create SOPs, and in our opinion, it doesn’t need to be more complex.
But if you want to dive deeper into creating SOPs, here’s a great read: How to write a standard operating procedure that makes sense
Unfortunately, establishing SOPs is only part of the equation.
The real challenge lies in making sure they’re being consistently followed.
That’s where training comes in.
You need to train your employees on these procedures, walking them through each step so they fully understand their responsibilities.
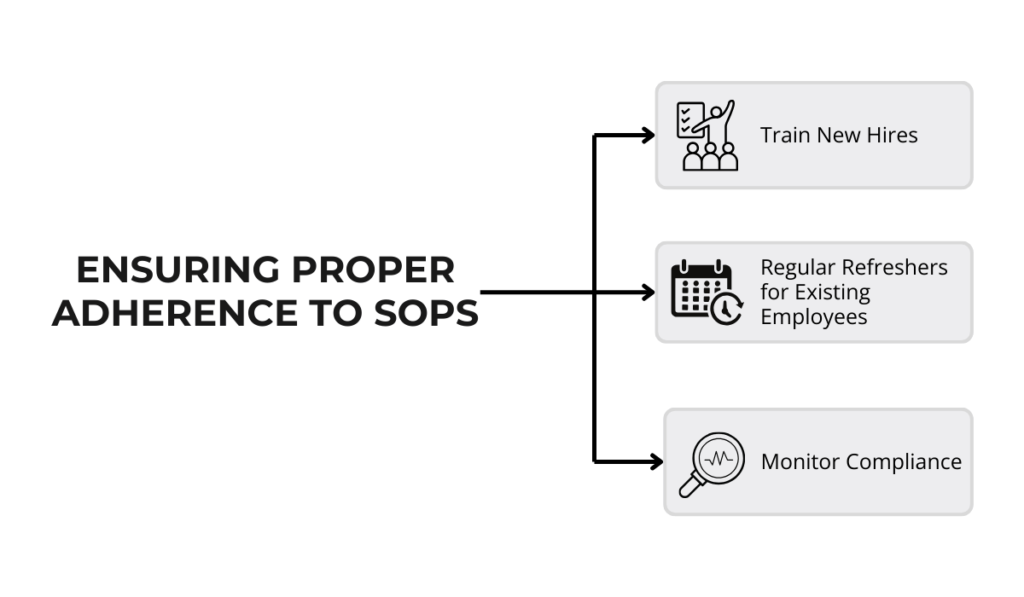
New hires should get thorough training on SOPs as part of their onboarding, and existing employees should get regular refreshers.
It’s easy for workers to slip into bad habits over time or forget certain parts of the process, and that’s definitely something you want to avoid.
It’s important to note here that SOPs are not a one-and-done deal.
To stay effective, they need to be regularly reviewed and updated based on real-world feedback.
Maybe you’ve noticed a pattern of certain tools going missing or being returned damaged.
Or perhaps employees are struggling to follow the check-out process as outlined.
This is a clear sign that your SOPs might need tweaking.
By consistently reinforcing these guidelines and adapting them when needed, you’ll create a culture where tool management is taken seriously, and everyone is on the same page – both figuratively and literally.
2. Label Tools with Barcodes or RFID Tags
When you have dozens, or even hundreds, of small tools moving across job sites, keeping track of everything by memory, or going from person to person asking if they’ve seen that one drill or wrench, is nearly impossible.
However, there’s a simple solution that can take the guesswork out of small equipment tracking and bring some order to this chaos: barcodes and RFID tags.
Barcodes and RFID tags are some of the most popular asset tagging methods out there and they make scanning and logging tools faster and more accurate.
The idea is simple:
Employees can scan the asset tag whenever a tool is checked out, returned, or moved to a different location.
This scan instantly logs the tool’s status, creating an automatic record of its movements and usage history in the accompanying system.
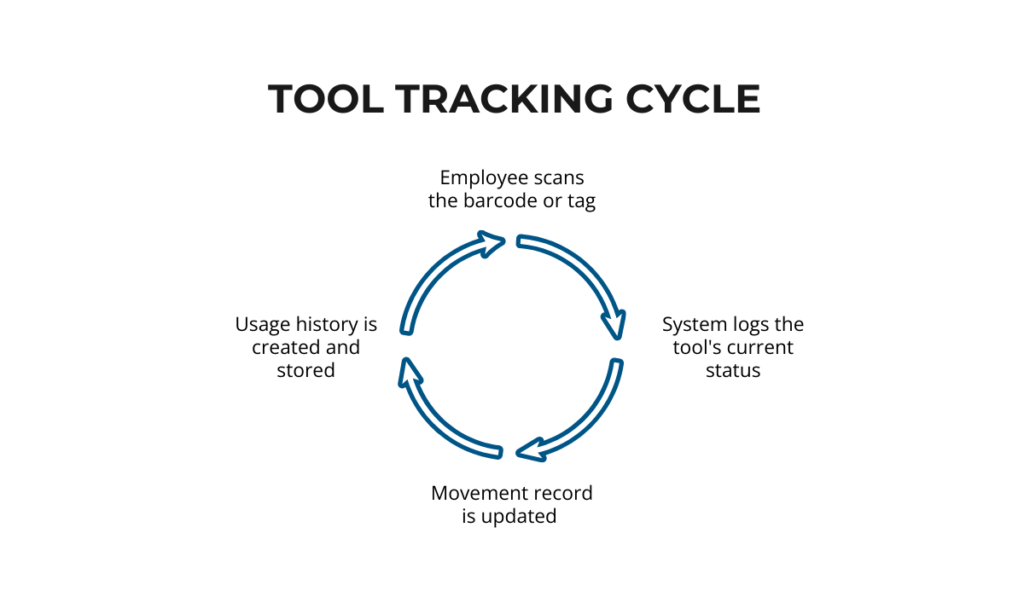
No more scrambling to remember who has what or where it was last used, and no more questions like, “Where’s the drill?” or “Who had the grinder last?”
While barcodes and RFID tags share the same purpose, there are some differences between the two.
Barcodes and QR codes offer the most benefit at the lowest cost.
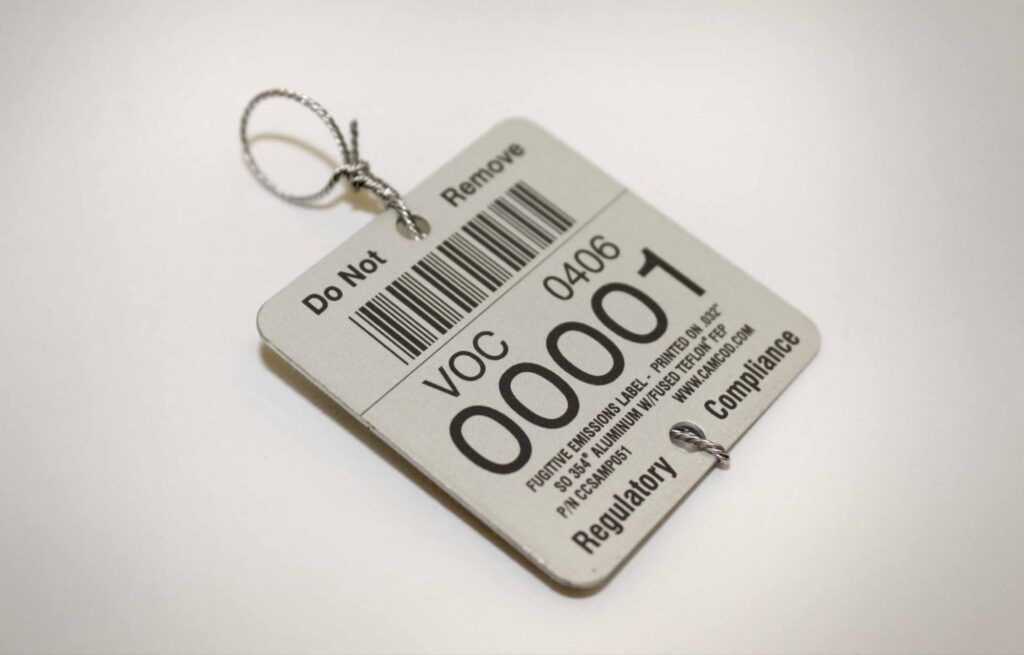
They’re affordable, easy to set up, and simple to use.
Because of their simplicity and affordability, nearly all asset-tracking systems have them, at least as an option.
The only real drawback to barcodes and QR codes is the need for direct, manual scanning of each tool.
Every time a tool moves or changes hands, it needs to be physically scanned.
This approach works well for small teams or projects, but it can get very time-consuming for larger ones.
RFID tags, on the other hand, don’t need to be scanned individually, making them ideal for busy sites where tools often change hands or move across large areas.
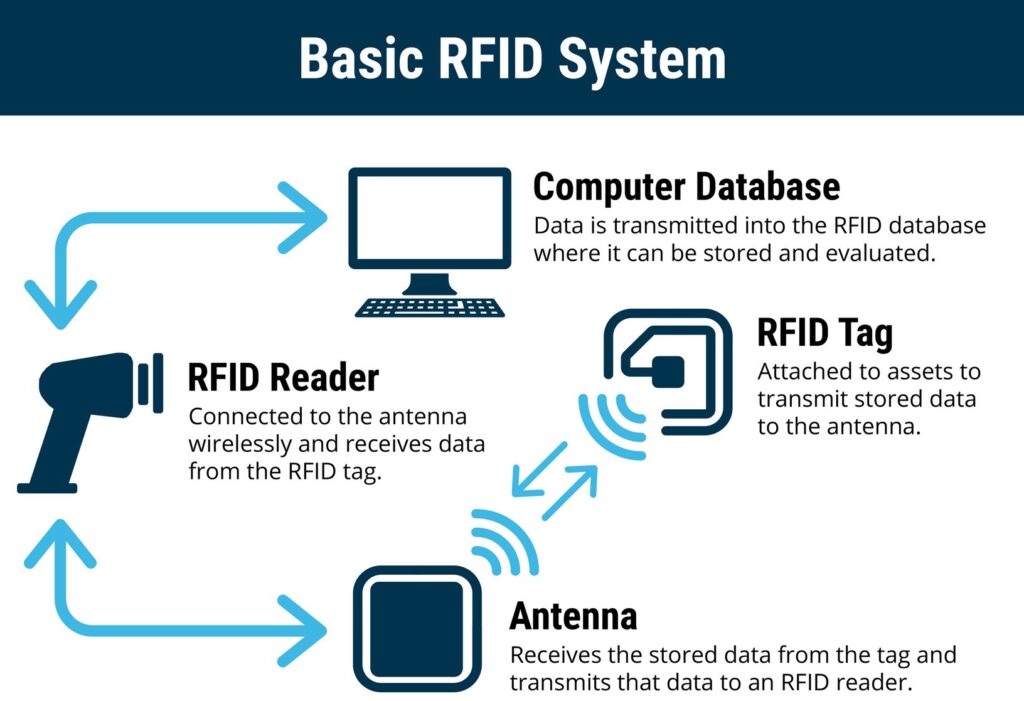
With RFID, you only need to walk through the area you want to track, and the scanner will automatically capture any tagged items within range.
This not only saves time but also reduces the chances of missed scans or tracking errors.
Now, for small but high-value tools like specialized drills, compact saws, or unique equipment, basic labeling might not be enough.
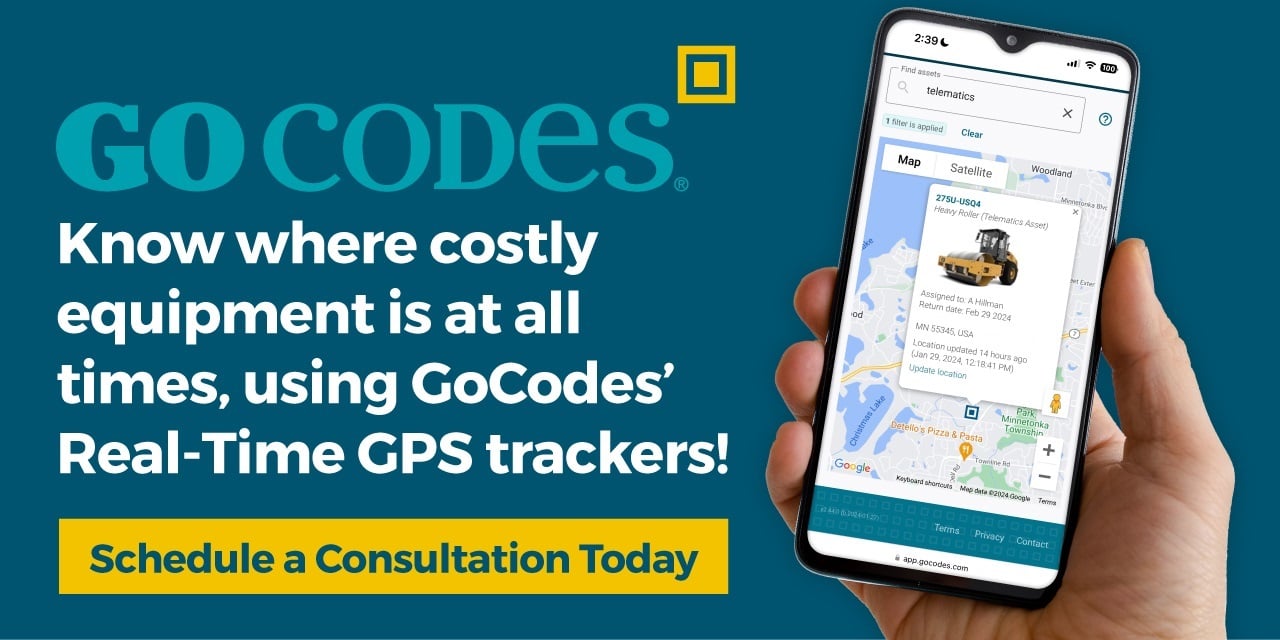
In those cases, adding GPS tracking on top of RFID or barcode tags can make a world of difference.
GPS tracking provides real-time location updates, so even if someone “borrows” a tool without logging it, you can track its exact location on the job site, or even spot if it’s been taken offsite.
Here’s what that looks like:
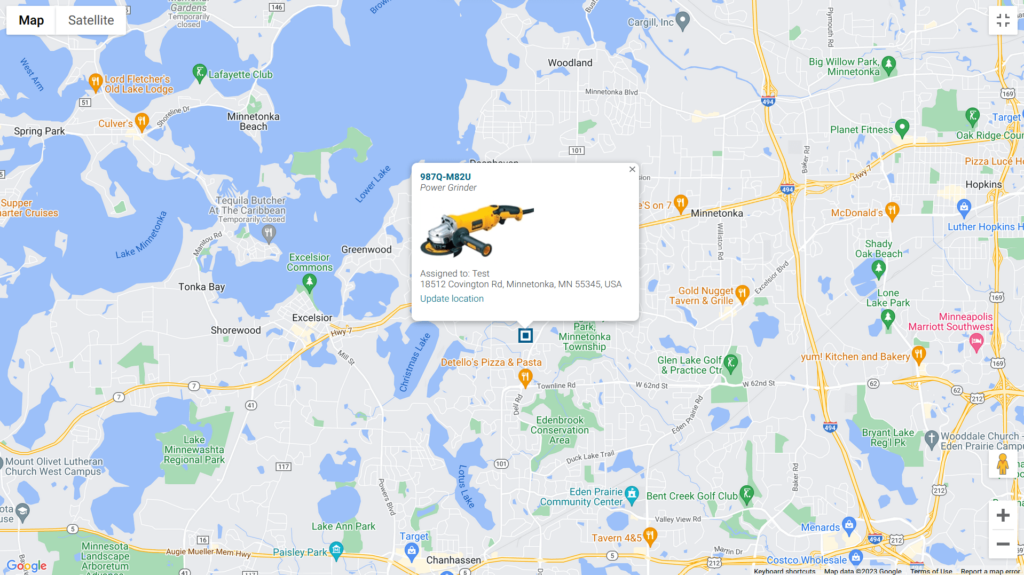
In practice, a mix of barcodes, RFID tags, and GPS tracking creates a flexible, multi-layered tracking system.
Low-cost items can be tagged with simple code-based labels, while high-value or high-demand tools get the added protection of GPS, keeping them on your radar at all times.
In the long run, this small step can make a big difference in tool maintenance and overall responsibility within your team.
But even with the best tags in place, without the right tool-tracking software, those labels are just stickers.
3. Use a Digital Tool Tracking System
For asset tags and labels to be truly useful, they need to be paired with software that can gather, process, analyze, and organize all the data.
A digital tool tracking system, like GoCodes Asset Tracking, does exactly that, making it one of the smartest investments for any construction business looking to improve small tool tracking.
It brings all the data you need into one platform – check-ins, check-outs, usage patterns, and even service schedules, helping you manage your tools more effectively than any manual method could.
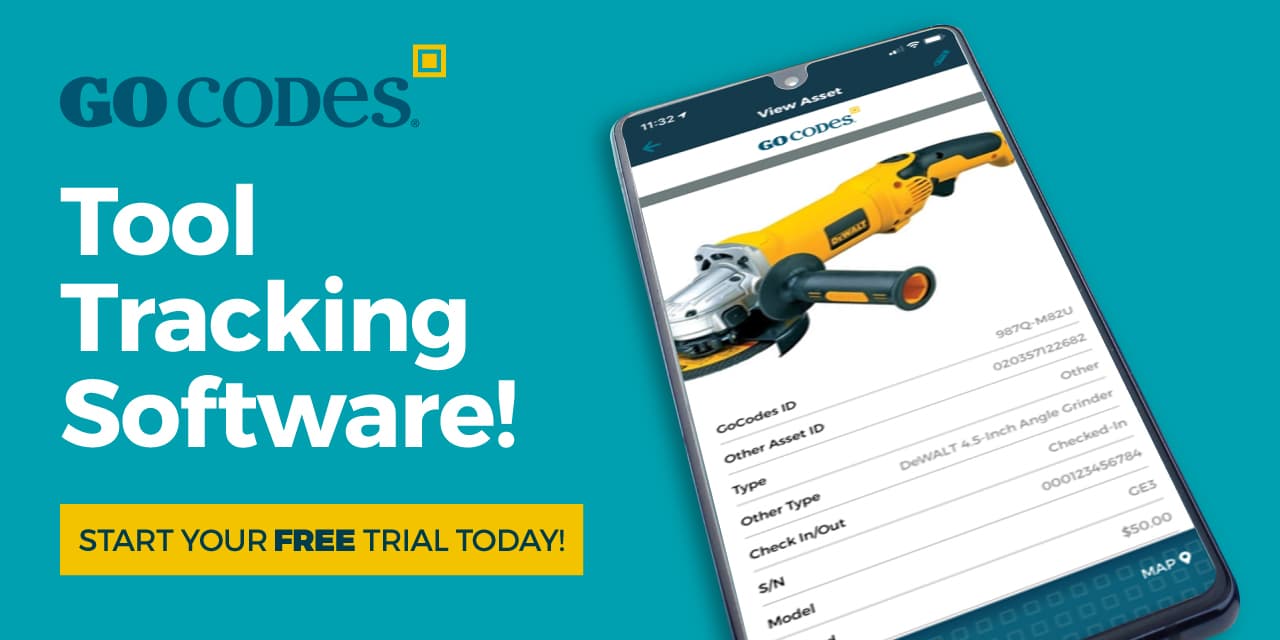
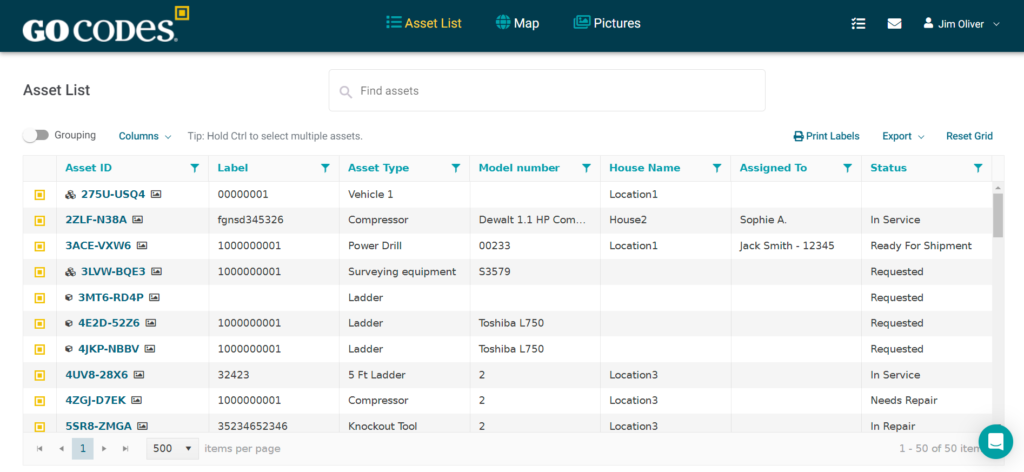
Imagine this: with a quick scan, your team can check tools in and out, note their location, and even mark their condition. The platform logs each action, creating a detailed history of every tool.
Here’s what that looks like in GoCodes Asset Tracking:

And since GoCodes Asset Tracking is a cloud-based tool-tracking platform, you can access it from anywhere, anytime, from any device.
Whether you’re on the job site or in the office, using a phone or a computer, GoCodes Asset Tracking provides a clear, up-to-date view of your assets.
Tool tracking systems like GoCodes Asset Tracking even let you create tool kits.
This is especially useful when certain tools are commonly used together, like a set of wrenches, a drill, and a tape measure.
Instead of scanning each item individually, you scan the kit as a single unit, simplifying the process.
Plus, if one tool in the kit goes missing, it’s immediately noticeable.
This feature makes life easier for both managers and field workers, speeding up the process and reducing check-out and return errors.
The benefits of using these tracking systems go beyond just knowing where a tool is.
Each scan helps you gather data.
Over time, this allows you to see patterns in tool usage and understand which items are essential and which are underutilized.

You might notice that certain tools are frequently checked out but rarely used, indicating that they’re taking up space without adding value.
Or, perhaps some tools are in constant demand and worth investing in more units.
Think about how much easier budgeting becomes when you know exactly which tools need to be replaced, repaired, or rotated.
So, if barcodes, RFID, and GPS tags are the ‘eyes’ on your tools, a digital tracking system like GoCodes Asset Tracking is the ‘brain,’ making sense of all the data and helping you make better decisions.
When it’s all paired together, you’ve got an asset management system that’s as efficient as it gets, making sure your tools are always accounted for and ready for the job ahead.
4. Standardize Your Tool Storage
When tools are scattered across a job site, misplaced, or left unsecured, tracking them becomes twice as hard, and the risk of loss, theft, or damage skyrockets.
That’s why setting up standardized storage on every site is crucial.
These aren’t just random spots where tools get tossed at the end of the day.
They’re dedicated areas like lockers, storage bins, or tool cribs designed to keep tools secure, organized, and accessible only to those who need them.
Locking up tools after hours also reduces the chances of unauthorized access or theft – a common challenge in construction.
In fact, according to the National Equipment Register (NER), construction site theft results in annual losses ranging from $300 million to $1 billion in the U.S., much of it preventable through better storage and security measures.
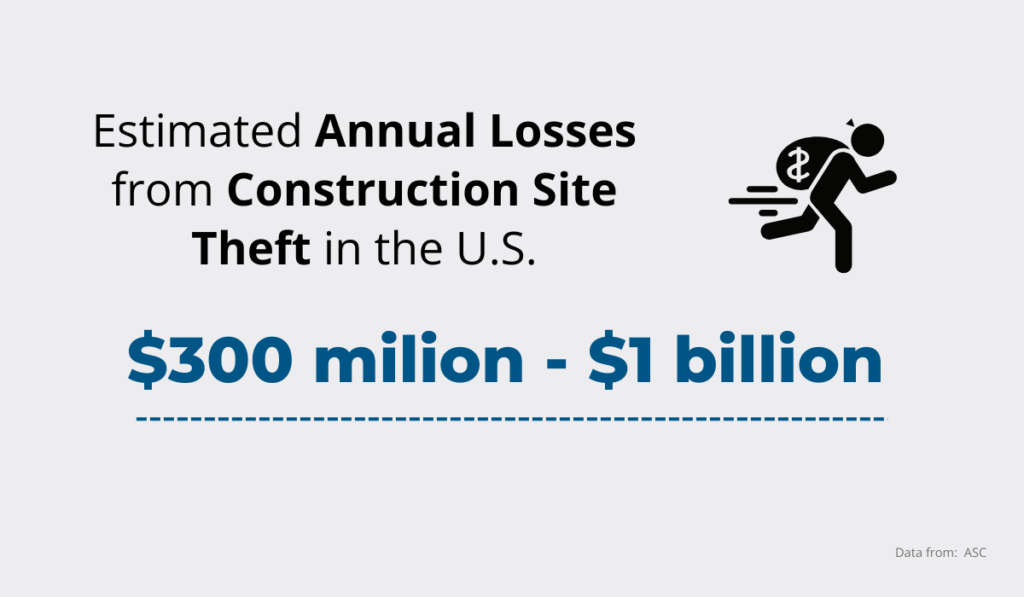
Lockers are a good choice for personal or high-value tools.
When each worker has their own locker or section, they become responsible for their tools, knowing they’ll be held accountable if something is lost or damaged.
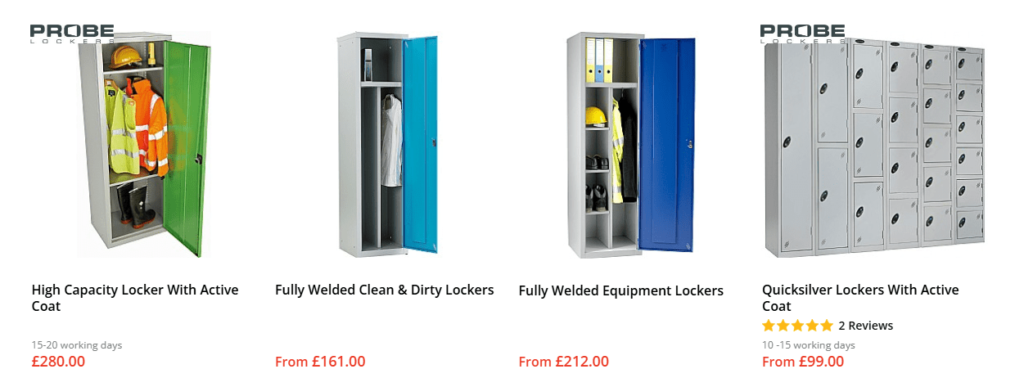
This individual responsibility has a positive impact on tool care and return rates because it’s easier for workers to respect equipment they know they’re responsible for.
In larger setups, tool cribs are another excellent option.
These are dedicated rooms or fenced areas on a job site where tools are stored, managed by a tool crib attendants.
The attendant oversees check-ins and check-outs, ensuring that every tool goes back to its spot at the end of the shift.
This level of tool control is especially useful for larger teams or busy sites where tools are in constant use. Not only does it keep tools secure, but it also makes inventory checks smoother and faster.
And let’s not overlook storage bins.
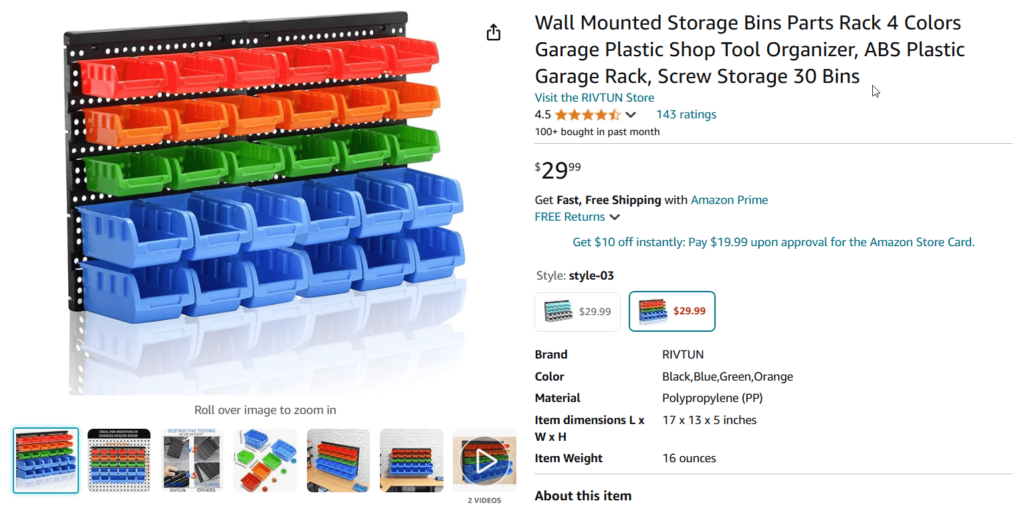
These are particularly useful for smaller tools and accessories that are easy to misplace.
Dividers within bins can keep smaller items like drill bits or screws organized, reducing the need to sort through piles of items just to find one piece.
Each bin can be labeled with its contents, so workers know exactly what’s inside without having to dig through them.
In the end, standardized storage is about creating a predictable and organized system for tool management.
Make the tools easy to find, secure, and ready for use, and your team can spend less time hunting for equipment and more time getting the job done.
5. Foster Accountability
Even with the best SOPs, carefully labeled tools, top-of-the-line tracking systems, and secure storage, there’s still a human element involved.
At the end of the day, people are the ones handling and returning tools and if they don’t take responsibility, tools will still get lost, damaged, and stolen.
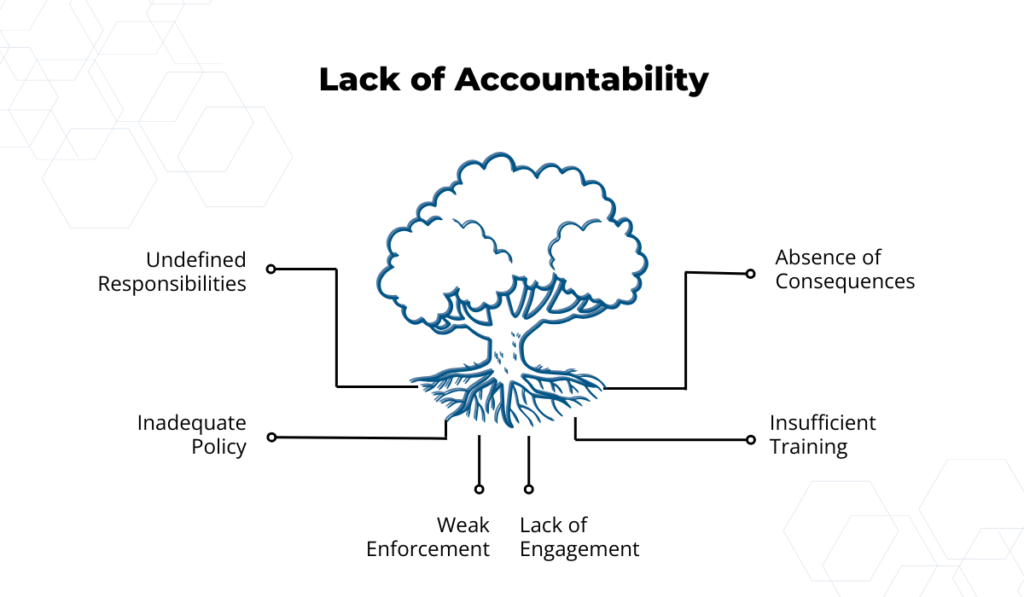
Because of this, it’s of utmost importance to create a culture of accountability, where everyone feels a shared responsibility for equipment.
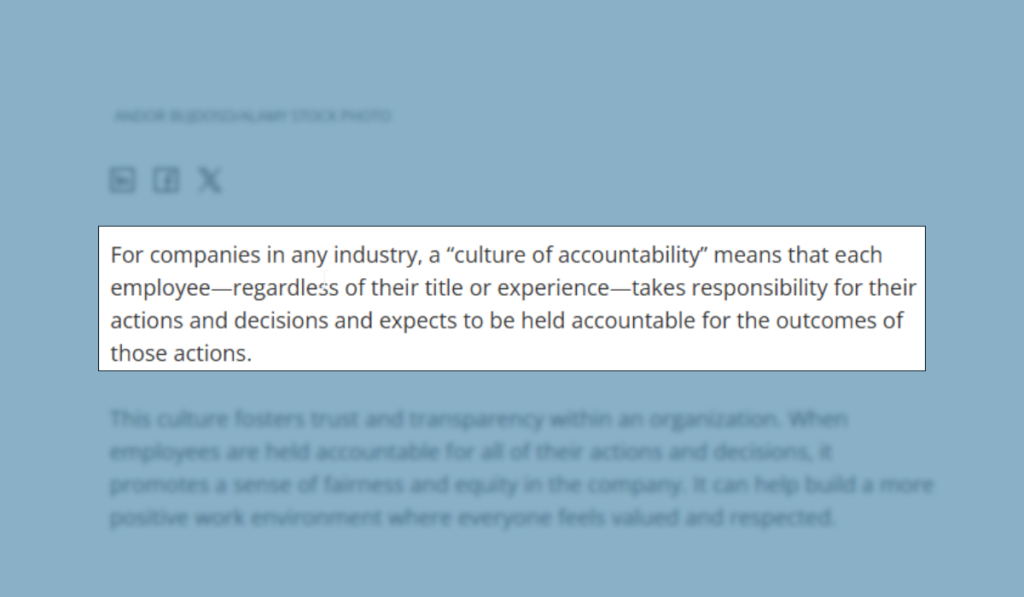
In terms of small tool tracking, accountability means employees take ownership of the tools they use. They handle them with care, return them in good condition on time, and don’t steal them.
But how do you build such a culture?
A few simple steps can go a long way in making sure everyone takes tool management seriously.
It starts with a simple check-in/check-out system.
This goes a long way in building accountability.
While you could start even with a paper-based system where employees sign their name to take/return an item, for larger teams with a lot of equipment in rotation, a digital system is a better choice.
Tool management software like GoCodes Asset Tracking can automate this process, logging each tool check-out/check-in in real time.
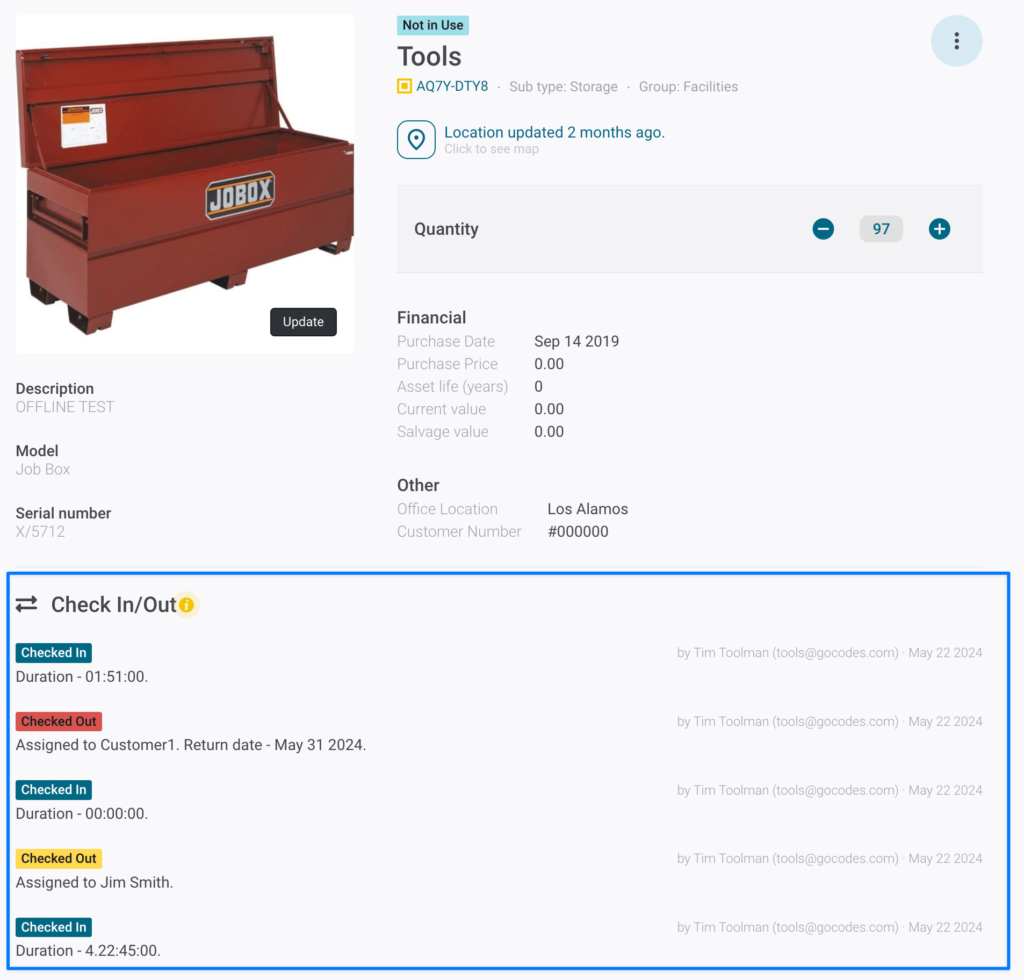
Workers scan a tool’s tag, which records who’s using it and when it’s due back.
This instant record keeps everyone on the same page and makes it easy to spot if something goes missing.
When employees know their name is linked to each tool they use, they’re naturally more likely to handle it with care.
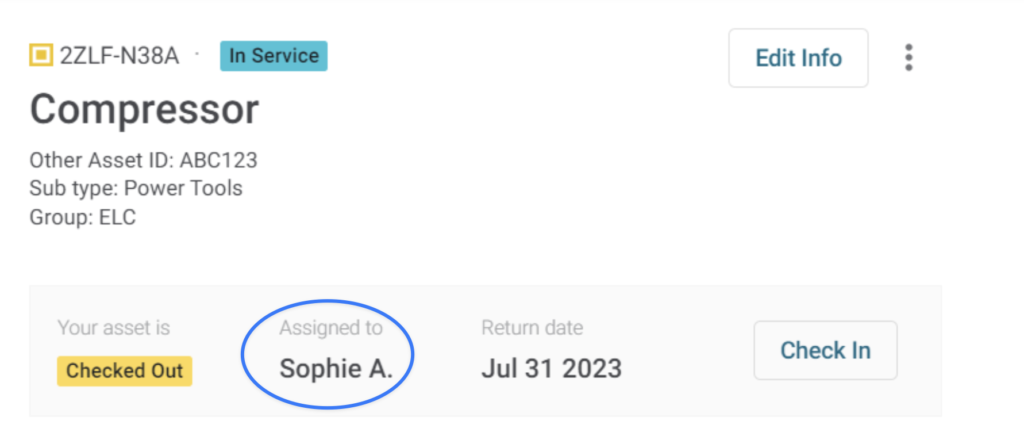
Think of it like renting a car – when it’s not yours, you’re extra careful to avoid any scratches or damage so you can return it in the same condition because you’re accountable for it, right?
The same principle applies to a job site.
To further reinforce this culture, consider implementing a loss prevention policy.
This policy should clearly outline what’s expected of workers in terms of tool handling and return. It also addresses the consequences if tools go missing or are damaged due to negligence.
While it doesn’t have to be heavy-handed, knowing there are consequences encourages employees to take their responsibilities seriously.
For example, some policies may require workers to pay for lost tools or implement disciplinary measures after repeated instances.
But fostering accountability doesn’t have to be all stick and no carrot.
Rewarding positive behavior can be just as effective, if not more so.
Consider setting up an incentive program where employees are recognized for taking extra care with tools or for reporting missing items promptly.
Simple incentives like gift cards, extra break time, or small bonuses, can make a big difference in motivating the team to treat tools as valuable resources.

When employees know their efforts are appreciated, they’re more likely to keep responsible habits.
Implementing this culture of accountability may take some time, but it’s a worthwhile investment.
When workers understand that they’re expected to return tools in good condition and that any
loss or damage will be noticed, they’re more mindful.
Over time, this builds a team of employees who respect equipment, know the importance of tool management, and take ownership of their responsibilities.
And, a team that respects the tools they use is a team that works smarter, keeps costs down, and delivers better results.
6. Implement a Daily or Weekly Inventory Check
Inventory checks might seem like an extra task at first glance, especially if you have small tool tracking software in place, but they’re a simple way to keep tool management sharp and prevent small issues from turning into costly problems.
A quick routine – whether daily or weekly – helps you catch missing items early and confirm that every tool is back in its place.
For smaller teams, a daily check at the end of each shift usually does the trick.
A designated supervisor or team lead can quickly review that all tools are returned to storage and ready for the next day.
This habit keeps the workspace tidy and cuts down on time spent searching for tools, so the team can start each day with everything in place.
For larger teams or busier sites, a weekly inventory check might be more realistic.
Once a week, managers or assigned personnel can go through all tools, comparing actual inventory with the check-in/check-out logs, to catch any discrepancies early on.
Although tool-tracking software like GoCodes Asset Tracking provides digital reports showing which tools are missing, overdue, or in maintenance, a manual review is still necessary.
On paper, everything may look perfect, but the reality can often be completely different:
- Employees can check out a tool, scan it back in, and then walk off with it.
- Tools might be used without any check-out record at all, especially during busy periods.
- Tools could be checked in as returned but left in the wrong place.
- Tools can also be damaged during use and checked in without reporting the condition.
- Tools can also be borrowed for side jobs, used off the books, or forgotten on-site after being checked in.
- Even with RFID tags, where scanning can be done in bulk, tags themselves can be removed, making the software blind to missing items.
These are just a few reasons why digital checks alone aren’t enough.
Manual reviews add a layer of security and accountability that software simply can’t always provide.
To show how digital and manual checks complement each other, here’s a quick comparison:
| Aspect | Digital Checks | Manual Checks |
|---|---|---|
| Accuracy | Immediate, precise data on check-ins/check-outs, maintenance needs, and tool locations | Confirms actual on-site presence, location, and condition of tools |
| Efficiency | Quick scanning, instant updates across devices | Requires time from a supervisor or team lead for a thorough review |
| Lost/Missing Tool Tracking | Flags overdue or missing tools based on scan history but relies on honest logging | Identifies unreported lost, moved, or incorrectly stored items |
| Condition Reporting | Allows notes on tool condition but may not catch minor damages | Physically assesses tool condition, identifying any hidden wear |
| Accessibility | Accessible from any device, on-site or off-site | Requires in-person review |
| Accountability | Links tools to user IDs for accountability | Reinforces personal responsibility with direct supervisor oversight |
| Limitations | Limited to data logged; can’t detect physically misused items | Time-consuming but thorough; catches misuse, misplacement, and missing items that go unrecorded |
As you can see, digital checks offer efficient tracking and reporting, while manual checks fill in the gaps and ensure your digital records match the actual inventory.
Together, these methods create a tool management process that’s as thorough as it is efficient.
These regular checks also reveal areas where security could be improved.
If certain tools seem to move between shifts without check-ins, it may signal a need for tighter access controls or storage adjustments.
The consistency of these checks reinforces accountability, showing that every tool has a place and every person plays a part in keeping them secure.
Conclusion
Tracking small tools might seem like a minor detail in the grand scheme of construction, but as every construction owner and manager knows, the costs of replacing lost tools, the time wasted searching for them, and the hits to productivity all add up fast.
Keeping these losses in check doesn’t take a miracle.
It just takes a few smart practices.
Start with clear SOPs, label every tool, and use a reliable tracking system.
Build a culture of accountability, and make inventory checks part of your routine.
Together, these practices help you save time, cut costs, and keep your tools secure and accessible.
And when you put them in place, the benefits show up where they matter most.
On the job site, in your budget, and in your team’s efficiency.

