
If you’re in the construction industry, you already know that the actual process of building an edifice is preceded by a range of pre-construction activities, such as land acquisition, design, construction planning, budgeting, scheduling, and obtaining permits.
However, when construction is about to start, having a clear view of the sequence of work in which a building is usually constructed can be helpful for both new and experienced contractors and construction managers.
So, we’ll assume the pre-construction stage is complete and describe the sequence of work that should take place during the construction stage.
In this article...
Preparing the Construction Site
The first step in the process is to prepare the site where construction will take place.
Depending on the site conditions, this may involve clearing vegetation, trees and rocks, demolishing old buildings, and doing ground leveling.
These tasks usually require bulldozers, excavators, and other heavy equipment.
They are followed by determining and marking exactly where the building will be on the site according to the approved design drawings.
The site layout is usually first done by surveying instruments like a theodolite. This is referred to as a stakeout or boundary survey.

After that’s done, wooden stakes are driven into the ground to match the exact layout of a future building.
Of course, site preparation also includes securing all of the facilities an active construction site needs, such as storage and toilets, utilities, drainage, and fencing.
Thus, this first step covers clearing and staking out the site along with ensuring the temporary facilities are on-site, up to the point when the required excavation can start.
Building the Foundation
This step starts with excavating the foundation pit and ends with pouring concrete over the prepared foundation reinforcements to create a concrete footing.
Excavation is performed according to the design plans, and its depth will depend on the type of building.
Once the required depth is reached, the ground in the excavated foundation pit is compacted, and a layer of crushed gravel is added.
Next, a layer of plain cement concrete (PCC) is poured over the compacted surface to prevent steel reinforcements (rebars) from coming into contact with soil and water and ensuring they can be laid out evenly.

After the PCC layer has settled, rebars that will reinforce the foundation, including column starter bars, are positioned according to the construction plan along with their formworks, i.e., the molds that will be used to hold the concrete when poured over reinforcements.
When everything is ready, concrete is poured and then vibrated to release the air trapped inside and make the foundation stronger.
The result is a concrete footing on which plinth beams will be constructed.
Constructing the Plinth Beam
Plinth beams are reinforced concrete beams that are built on top of the foundation to avoid expansion and cracks in the walls when the foundation settles.
Also, they tie the future columns together and evenly transfer loads when the walls are constructed.
They are constructed at the plinth level, i.e., between the foundation and walls.

Plinth beams also protect future walls from moisture, hold the backfilled material, and serve as a bearing surface for masonry work.
In essence, they separate the building’s substructure from its superstructure.
Overall, plinth beams reinforce the future structure, protect walls from the effects of foundation settling and moisture, and evenly transfer loads from the walls to the foundation.

Backfilling the Structure
The next step is to backfill the areas inside the plinth beams constructed on top of the foundation with the soil extracted during excavation and/or other material.
The backfilling is done in layers, followed by compacting the soil in each layer.
Backfilling is used to support and strengthen the building’s substructure up to the plinth level and improve future water drainage.
Here’s a short video that shows how the foundation is filled, compacted, and leveled.

When backfilling, most contractors will start with a layer of backfill stones to avoid soil settling issues afterward.
The filling should start in corners, and soil should be evenly distributed in layers, each of which is watered and compacted.
The backfilling material is often brought in from elsewhere because the soil excavated on-site does not fit the parameters for quality backfilling, such as being free of organic matter, roots, vegetation, harmful chemicals, etc.
The backfilling and compacting process is completed when the material reaches the plinth level.
Building the Superstructure
Remember those column starter bars that were left sticking out at the right places after pouring the foundation?
They will be used to erect the building’s superstructure—in other words, the part of the building above ground.
That process will start by constructing columns, moving on to beams, and then the slab, thus creating a frame for the superstructure.
Columns are constructed by pouring concrete into shuttering (formwork) installed around them and erecting them up to the slab level.
Here you can see a simplified version of a house and the building’s components we mentioned until now, courtesy of The Constructor:

As you can see, the building’s substructure is everything below the plinth beam, including the foundation.
Above ground level, there is a frame for the superstructure, which consists of columns that will support the beams, which will, in turn, support the slab, thus creating the frame for masonry walls.
If you want to see how the columns, beams, and the first-floor slab of a multistoried building are built, here’s a 20-second overview:
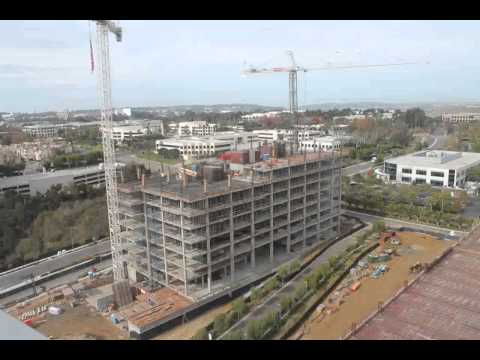
So, when a building has more than a single floor, the first-floor slab will again have column rods sticking out of it for casting columns for the next floor, thus gradually building the superstructure all the way up to the roof slab.
Doing the Masonry Work
So, the building’s skeleton is constructed, columns, beams, and slabs are in place, and now it’s time to build walls and create the building’s exterior and load-bearing interior walls.
That’s where masonry work, such as stonework or brickwork, comes in.
It entails masons building walls by laying single units (stones/bricks) in a systematic way and binding them together with mortar.
Nowadays, concrete blocks are often used to build masonry walls due to their good insulation, fire resistance, and thermal efficiency properties.
Here is an inner block wall next to an outside brick wall.

There are different types of masonry walls, such as structural or load-bearing walls, which, as their name suggests, act as a load-bearing system.
In any case, when masonry units like blocks or bricks are laid systematically to strengthen the built structure and are bound with mortar, the building gets its exterior and structural interior walls.
Placing the Lintel
As the walls go up, openings for doors and windows are left, so the next step (which usually occurs as the masonry work progresses) is to install the lintels above them.
A lintel is a beam constructed above the spaces left for doors and windows to support the weight of the structure that will be built above it.
Lintels are categorized according to the material they’re made from, as shown below, courtesy of Allabout Civil:

The three bottom ones are used the most when it comes to buildings—precast concrete, steel, and reinforced brickwork.
If you want to learn more about steel lintels, IG Steel Lintels provide ten lintel installation tips on their website and in this video:

Regardless of their type, lintels are placed above doors, windows, and other openings to carry the load of the structure that comes above them.
Constructing the Roof Slab
As the building’s superstructure goes up in stages (columns, beams, and slabs, followed by masonry work), it will inevitably reach the top.
At that point, it is required to build the roof slab (roof deck), which should be waterproof and protect the building from the elements.
Today, most roof slabs are made from reinforced cement concrete (RCC).

If we assume that the building in question will end with a concrete low-slope roof deck, for example, then the final product may contain many layers to insulate the roof and protect the building from the elements.
Below, you can see an example of the finishing roof deck layers of a building in Florida.
From the bottom up, the roof slab is made from reinforced concrete, followed by lightweight insulating concrete, insulation, and so on.

Regardless of the design solution, the roof slab will be constructed after the masonry work is completed to protect the building from the elements.
Installing Doors and Windows
The next step is to install doors and windows in the openings (with lintels) that have been left for them.
Door and window frames can be made from timber, aluminum, steel, fiberglass, and vinyl (PVC).
Since we’re talking about constructing a new building, these frames will be installed during or after the masonry work is completed, depending on the frame material properties and other requirements, but generally before plastering.
Because the range of types and designs of doors and windows is practically endless, we’ll just show some types of windows typically used on buildings.

In any shape or form, doors and windows will be installed once the building’s walls are erected and the roof is done.
Doing Indoor Installations
As the building’s envelope is almost done, indoor installations come into focus.
In other words, the building will need to be equipped with plumbing pipes, electrical conduits with wiring and cables, and different ducts, including HVAC (heating, ventilation, and air-conditioning).
These works take place according to the construction plan and different engineering drawings, which are nowadays increasingly converted into digital 3D models by utilizing building information modeling (BIM) software or hiring BIM specialists, like Electrical 3D Construct from Chicago.

When using BIM software, workers have a very clear understanding of where exactly each pipe and cable goes, which leaves less room for mistakes and potential miscommunication.
The subject of indoor installations (plumbing, electrical, ventilation) is very broad, so just remember that these installations are done before plastering, in accordance with the engineering drawings and the construction schedule.

Plastering the Building
Now that the interior installations are done, the next step is plastering the building.
Plastering is the process of covering masonry walls with a mixture called plaster—a mixture of cement and sand with the required amount of water (not to be confused with mortar).
It is done on external and internal walls to cover any defects in masonry and serve as a base for painting, while on the external walls it also serves as protection from the elements.

Although plaster does have some minor sound and thermal insulation properties stemming from making the walls a bit thicker, most external and internal walls will require additional waterproofing and insulation.
You can read more about the different types of plaster here.
Doing the Flooring
Inside our building, plumbing, electrical, and HVAC installations are done, door frames are installed, and walls are plastered.
The next step is doing the flooring.
Naturally, there are different types of flooring, and they differ according to their use, characteristics, and esthetics, creating an endless array of options, starting with various flooring materials, such as wood, stone, ceramic tiles, etc.

This means that the selected flooring will depend on the purpose of the room and the client’s preferences, and flooring installation operations will occur according to the construction schedule.
Painting the Building
In this simplified sequence of construction operations required to finish a building, the final step is painting the building, both inside and out.
Inside the building, walls are painted to improve their appearance, while different types of internal wall paint finishes provide various features like being washable, stain-resistant, odorless, or anti-microbial.
Outside the building, plastered exterior walls are, aside from aesthetics, painted to protect the building from harsh weather conditions and sunlight.
For instance, a special type of exterior paint creates a heat barrier (Thermal Shield) that resists over 95% of UV radiation, thus reducing heat entry/exit and saving energy.

Other types of exterior wall paint can be waterproof, have anti-graffiti or stain-resistant properties, and so on.
Although we said that painting the building’s exterior and interior walls according to the design specifications (i.e., the client’s preferences) is the last step in the construction stage, that’s only partially true.
Usually, there are many minor works to finish (e.g., landscaping, driveway), punch lists to complete, and final inspections to pass before the building can be turned over to the building owner (post-construction).
Conclusion
So, we described what happens during the construction of buildings, from initial site clearing to the final coat of paint.
We hope this article helped you gain a clearer view of the sequence of work in which different buildings are usually constructed.


