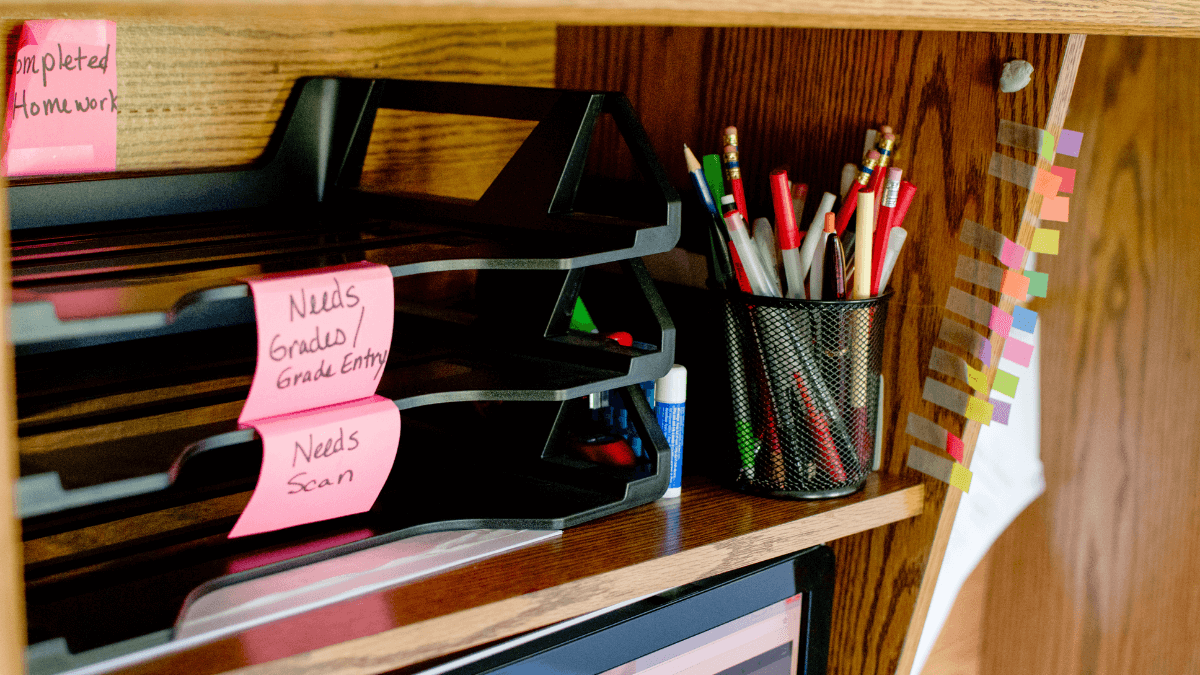
Keeping a classroom organized is one of the many challenges teachers face, but you can overcome it.
Since many people use classrooms and there often isn’t much space, you have to make the most out of what you have.
This article brings you fourteen tips on organizing your classroom that save you time and money.
If that’s your goal, keep reading!
In this article...
1. Make Sure All the Desks Are Accessible
When all desks are accessible, the teacher has complete control of the classroom.
Teachers pay a lot of attention to desk placement because it can affect the atmosphere in the classroom, as the students’ designated space.
After all, the point of your class is to engage students and encourage them to participate.
You don’t have to arrange the desks the old-fashioned way, forming rows facing the teacher and the blackboard.
While that setup was practical in the past, because students had to look straight ahead if they wanted to see what the teacher was writing on the blackboard, it also didn’t allow teachers to see what the students in the back rows were doing.
Today, other setups are seen as more beneficial.
The most practical classroom setup is when the teacher is at the top of the classroom, giving them the perfect view of all students and allowing them to walk around and access each one.
One of the most common setups nowadays is the U-shaped classroom, which lets everyone sit in the front row while allowing the teacher to see each student.
The good thing about classroom setups is that your hands aren’t tied—you’re free to change the layouts until you find the one that works best for your class.
2. Encourage Students to Keep Their Desks Organized
If you want to keep your classroom organized, ask your students to manage their desks.
When there aren’t many things on the desks, the students can pay attention to the class without unnecessary distractions.
Therefore, promoting desk organization helps your students focus during class and fosters responsibility.
The students understand that they’re in charge of cleaning up their desk and keeping it tidy.
For younger students, in particular, it is important to model the behavior you want them to adopt.
When it comes to tidying desks, you can start by creating a model which you can hand out to students.
That way, they will know what you expect of them and have clear pointers for arranging their desks.
Explain to your students that they should always put away unused supplies inside their desks to eliminate clutter.
Also, color-coding works well for some teachers who want their students to recognize notebooks for each subject, while others find it too complicated since students take a lot of time finding the colors in question.
Still, dividing notebooks or parts of them by colors might help some students organize their notes.
Share your organization model with your students to encourage them to follow it.
3. Turn Chairs Into Storage Space
Keep your classroom organized by using chairs as storage space.
Since most of the classroom space is occupied by desks, there isn’t much storage space for all the students.
However, such space is necessary for every teacher who wants to keep their classroom organized.
Otherwise, unused writing utensils, notebooks, and books will be lying around the room or desks, creating a mess and distracting students.
You can use chairs for storage if you stick velcro tape on their backs, as well as some essential supplies, allowing students to stick items they aren’t currently using on the back of their chairs easily.
In addition, you can purchase baskets and zip tie them under the chairs, which lets your students place bigger supplies under their chairs and get them out the way.
The easiest solution might be getting each student a chair pocket, which is easily set up and lets students place unused items inside the pocket and close it.
By turning chairs into storage space, you’re keeping your classroom more organized.
4. The Laminator Is Your Friend
Laminating paper worksheets keeps your classroom more organized.
This one might not be as obvious, but the more you laminate, the less backup you need to have.
If you need to use a set of worksheets for your class, you can count on them getting damaged, drawn on, ripped, or wet by accident.
In addition, you will not get every worksheet back.
As a result, you will not only have to print more and more of them over time, but you will also have to find storage space for all the worksheets you will be using.
When you opt for lamination, you can be sure that the worksheets won’t get ruined while the students are using them.
You can laminate all the worksheets you need, save them in your storage space, knowing that you won’t have to create more backup over time.
Your students can write on the worksheets using dry markers, which you can easily wipe off and reuse the worksheet later.
If you want them to practice writing with a pencil or pen, you can let them write down responses in a notebook or on a sheet of paper without having to save them in your storage space.
When you laminate paper worksheets, you can easily reuse them, cutting down on the number of items in stock.
5. Use Student Portfolios
Student portfolios allow you to be more organized in your classroom.
You can place all papers, assignments, and feedback related to the same student in a single place—a portfolio.
That way, you can easily find any document you need or add a new one.
Another benefit of portfolios is that parents and other teachers can also use them to see what the student is working on, read your notes and feedback on the student’s work, and get the necessary information from the same place.
You can add different sections to the portfolio, marking them in different colors for easier managing.
The sections can include:
- learning materials
- handouts
- drawings and pictures
- self-assessments
- other class materials
In other words, you can store any materials you think the students can take something away from and remember in their portfolio.
Hand out portfolios to your students to organize their paperwork and classroom.
6. Keep Track of Electronics
Keep tracking of electronics for better classroom organization.
As a teacher, you often don’t have that many electronics to use in class due to limited funding.
However, some classes have more electronic devices, which means they need an efficient organization method to make sure you’re using them optimally.
These items are valuable to students and teachers as they provide an exciting means to learning and aren’t easily replaceable if the school doesn’t have any extra funds on the side.
To organize laptops, Chromebooks, or tablets, find a container that separates the items and lets you stack them vertically, allowing you to keep all of them in the same place without wasting space.
Mark the piece of technology and its charger with a matching color or sticker to ensure no one switches the chargers and makes it impossible to use the equipment.
Your classroom’s organization will reach a new level when you take care of electronics.
7. Color-Code Your Classroom
Color-coding assists you in organizing your classroom.
If you color-code your classroom, you will make it easier for your students to find the supplies and books they need.
Let’s say that your math materials are in yellow binders or boxes.
When you tell your students it’s maths time, they will know they have to find their yellow binder, organizer, or crate.
It will be a lot easier to get around and locate the needed materials.
However, you don’t have to color-code by subjects. You can assign colors to students or days of the week. The point of color-coding is to make your life easier and manage materials better.
Of course, you can color-code to help yourself—use one color for absent students’ work, another for future worksheets, a third for your feedback, and so on.
The most important thing is to find a system that works for you and remember it. Once you do that, you’ll know your way around your classroom better.
If you’re unsure how to help your students remember what each color means, create a guide that you can stick on the classroom wall so it’s visible to everyone.
Using color-coding helps you and the students find necessary materials.
8. Create a Teacher Toolbox
Having a teacher toolbox can make your classroom more organized.
As a teacher, you know you always have to have many supplies and materials in the classroom.
Of course, you’ll want to organize them in a way that lets you quickly find and get what you need, preferably without looking through many drawers and closets while searching for it.
A great way to achieve this with smaller supplies is to create a teacher toolbox that contains different-sized compartments that serve as small shelves.
Similar to a constructor’s toolbox filled with nails and screws, you can use it to store staples, pens, pencils, and any other kind of supply you need to have at hand when in class.
Some teachers even use it to store candy!
Because toolboxes are usually metal and don’t have as many drawers as you need, you can find a plastic version.
Then, you can paint the toolbox however you like or use decorative paper or stickers.
Creating a teacher’s toolbox will help you keep your supplies and materials organized.
9. Have a Designated Supply Station
A supply station can help your classroom look more organized.
When your students know where supplies are, they are more likely to get up and take them, thus ensuring that they can finish the task on time with all the necessary materials and supplies.
Unless these supplies are in plain sight, some of your students might not know they are even there.
Another benefit of supply stations is having the supplies you want to share with your students in the same place and easily accessible to the entire class.
Such a station can be as simple as a tray, whether plastic or wooden.
When you have a decently sized tray, you can paint or decorate it to match your classroom.
Then, you can add plastic cups to hold the pens and pencils meant for students and use carton barriers as dividers for different sections of your new supply station, like the erasers section, or a post-it notes section, among others.
Your station can contain whatever you need for the class, meaning that you can always switch it up to suit your needs.
Having a supply station helps you organize supplies shared with students.
10. Make A “Where Is It” List
Have a “where is it” list to always know where the assets are, making you more organized.
When dealing with electronic equipment, books, and valuable items, you need to have a “where is it” list.
Otherwise, you won’t know where each item is, which will undoubtedly lead to confusion, misplacement, loss, or even theft.
The list can be a simple paper list the students can use to write down their names when taking the equipment and returning it, creating a basic check-in/check-out system.
Of course, a paper system has its flaws as the paper can easily get ruined, handwriting can be challenging to read, and you can easily lose such documents.
If you opt for spreadsheets, students have to use a PC to write down the item name, date of usage, and name.
However, spreadsheets also have disadvantages—only one person can use them at a time, anyone can accidentally delete data or create copies of the documents, making it difficult for you to have a single database of all information.
Even inexpensive equipment can be highly beneficial for teachers in schools with low funding, and they can’t afford to lose it.
Because of this, check-in/check-out software is an excellent option for teachers who need a system for their equipment or valuables.
The software lets you check assets in and out by logging into the system and changing the item status.
Everyone who uses it can see where each item is and when it will be returned.
Come up with a check-in/check-out system for your classroom to become even more organized and efficient.
11. Use Labels and QR Codes
Label your equipment for better organization.
If you have lots of items in the classroom, it might be hard to differentiate them; for instance, if you have ten tablets, you might not know which is which.
You might not think it’s even important, but as soon as there are issues with the asset or it goes missing, you will not know what happened to it.
Such an incident can cause class disruption not only for you but for anyone else who was planning on using the item.
If you want to solve this issue, label your equipment.
Gather all the valuable items from your classroom to tag them—write down the codes on paper, make the labels on your PC and print them, or use software that lets you tag your assets with QR codes.
The handwritten labels can become hard to read over time, and anyone can easily rip them off, but QR codes are more difficult to remove seamlessly.
Whatever method of labeling you choose will help you have a more organized classroom.
12. Minimize Mess With See-Through Storage
Organize your classroom using see-through storage boxes.
Having all your classroom items stored in see-through boxes makes your classroom look uniform.
The boxes can be positioned along the wall or on the shelves in any form you choose, as long as it looks neat.
Storing your unused classroom items in see-through storage boxes makes it easier to understand what is inside.
That way, you don’t have to rummage through boxes to locate the thing you need.
You can spot it right away through the material and leave everything in the same order after taking the thing out.
Instead of using different storage methods for various items, you can stick to only one form of storage as it helps everything look neatly arranged.
Find a way to mark each container, so you know where each set of items is.
You can even label the boxes to make it easier to understand where smaller items are if you can’t spot them despite the see-through material.
See-through storage boxes help you locate items quickly and be more organized.
13. Don’t Be Afraid to Get Creative
Creativity can help you organize your classroom efficiently.
Even if you don’t have as many resources as you’d like, you can make your classroom interesting, engaging, and well-equipped.
To avoid spending a lot of money on specialized classroom equipment, you can create it yourself using household items.
For example, you can repurpose toothbrush holders as pencil boxes, ensuring that your students don’t lose a pencil.
This way, all of them will be in the same holder, and if one isn’t sharp enough, they can quickly get a replacement. The box also removes the risk of a pencil rolling off a desk and its point breaking in a bag.
You can use toothbrush holders for paintbrushes, pens, pencils, markers, or anything of that size that can fit.
A glass jar can hold your spare colored pencils, pens, or any other supplies that you want to share with the class.
Place the jar on your desk so your students can simply walk up to it and take whatever supply they need to continue working.
The best thing about repurposing items is that you can involve the students in the process and encourage them to find their creative side.
Use your creativity to repurpose items and make your classroom even more organized.
14. Keep Your Students Involved
Involving your students helps your classroom organization.
A single teacher can organize a classroom perfectly and ensure that everything is in its place, but as soon as students walk in, the room starts slipping into disarray.
Even if you have the best organization system and know where each item is, it will be impossible to keep it that way without your students’ cooperation.
They might return items to the wrong box, rearrange them, mix various objects instead of keeping them separate, and create a mess it will take a while to eliminate.
You can tackle this obstacle by including your students in organizational activities.
Assign each activity to a student to help them acquire a sense of responsibility for a piece of the organizational system.
You can set up a reward system to motivate the students who do a great job and encourage others to do the same.
When more people are involved, your class organization will be up to par.
Conclusion
Keeping a classroom neat, tidy, and organized doesn’t have to be as big of a task as it seems.
You can start working on that by organizing classroom desks and turning chairs, toolbox, and see-through boxes into storage space.
Also, keep track of your assets and tag them to always know where they are.
If you don’t have a lot to invest, get creative and reuse household items for classroom storage.
On top of that, encourage your students not only to keep their desks but the entire classroom organized.


